Thursday, 31 October 2013

Recycled sweet tins

If your like me and use tins for storage this idea will appeal to you

Take some sweet containers


Paint all over with blackboard paint


I gave them 3 coats thinly applied, with a through drying in between coats


I then used a chalk pen to write on the contents


The reason I've used chalk board paint is because as the contents vary, I can change the writing on the tin

If you have a family like mine, they open every tin to look inside
this way its written on the side ( for stacking) and top 


Tuesday, 29 October 2013

Love Hearts - Simple present for a loved one - Darling your Dynamite - Christmas, Valentines?

 Take 3 packs of love heart sweets


Wrap each individual one in red paper


When wrapped, fasten together with a pipe cleaner or black ribbon


Add a tag with the words

`Darling your Dynamite`


Here is a tag for you to print and use

Right click and save to your computer
Print and cut out
Punch a hole
Thread some ribbon through the hole and attach to the dynamite


Sunday, 27 October 2013

Pots of Snow

I found these glass jars in the shops for a pound

There was 4 in a pack


I decided to make pots of snow and for the jar to have a use after the contents are eaten I decided to paint a disc / circle with blackboard paint


I then wrote on the title `Pots of Snow` with a chalk marker so it can easily be removed


And to jazz them up I put a self adhesive topper on the lid and some ribbon around the top


All that remains to do is to attach some labels


Saturday, 26 October 2013

What to do with candles? Decorative Christmas candles

I was given a set of three pillar candles and the only request was, see what you can do

Well I can tell you the old brain box has taken a hammering while I had some ideas

Firstly I would like to thank Lewis from Furniture Plus for the candles, which was from here

Thank you

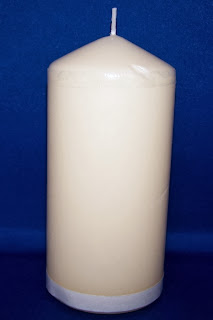
Here`s what I was given


So I took the largest, think big

I first printed out an image on to tissue paper, as tissue paper doesn't go through the printer very well I first secured it to a A4 sheet


And printed on normal settings
I set that aside to let it have a through drying

I then put double sided tape around the top and bottom


Then rolled the candle in silver glitter


To attach the image to the candle I placed it in between the silver glitter lines
I then  embossed the image with a heat embossing tool all over to melt it to the candle, this takes seconds, so be careful. 
Wave the embossing tool all over the image to secure it to the candle


I was pleased with this and turned my attention to the small candle


This was easy because it was decorated with peel offs and gems
I think it came out very well


But when this was done the middle candle looked bare

After many deliberations I thought I`d try a new technique for me and although I enjoyed trying it, the blue could have been darker


To get this effect, I took some Epsom salts and coloured them with blue colouring and peppermint flavouring

I then painted the candle with PVA and rolled the candle in the salts, they adhered well

I attached a ribbon and some snow flake embellishments


To display the trio of candles I put them onto a silver plate and added some clear stones


And a few sprayed pine cones

What a great Christmas display and thank you Lewis

Thats all I need now is one of these tables to display it on ....


Thursday, 24 October 2013

Magnetic Memo Pegs

These are easy to make and make an idea gift

There are various ways to make these, but this is my ideas

Take some everyday wooden pegs

Separate into three parts


Using suitable markers, I used promarkers in this instance
Colour all over with a red marker


Glue two magnetic discs (using a strong glue) onto the back of one part 


When dry assemble pegs


Add some toppers using a strong glue
I use silicone glue


Alternatively following instructions above, colour the pegs blue


Or even multicoloured and write wording using a white gel pen


These are great packaged up with cello and attaching a topper


Tuesday, 22 October 2013

Christmas Gift Tags

Gift Tags 

Some I made using recycled paint charts from DIY stores

Firstly I cut out some tags using brown Kraft card and punched a hole


I then put some ring reinforcer's over the holes


And coloured them in 


I used a green promarker for this

I asked at my local DIY store for some paint charts and were given these freely
I also painted a room in my house light green


I cut some triangles out and some small squares
I used a small Christmas tree punch for the trees


I fastened the paint chart triangles using PVA glue to the tag, put some faux stitching around the outside
and added some bakers twine


These ones I used some self adhesive stickers from Baker Ross and some peel off sentiments


Sunday, 20 October 2013

Free Fonts for Christmas


Something different for today, as I`m not a very good freehand writer, I have been hunting around for some fonts I can use on my Christmas makes

Above is just a selection of my favourites, there are 100`s more that can be found

I use daFont and they are free to use personally and so easy to put on your pc.

Basically you download the zip file to your PC
And unzip to you font folder

(If you cant find your font folder, click start ( bottom left hand side of screen) and type font in the search box)

The folder will come up

Here is the links to my favourite fonts


Wednesday, 16 October 2013

Christmas or any occasion countdown sign, DIY advent calender

I was in Dunelm Mills the other day and they were selling off their wooden signs for 49p

There were lots left and I dismissed them as I couldn't think who or why I would want them

Then as I perused the Christmas things as one does, i had a light bulb moment

I should purchase some just in case

In case of what I didn't know


Well now I do know after much thought I have come up with this


To make I put masking tape over the edges and painted the white area with blackboard paint

I purchased a small pot on Amazon and boy does it go a long way, its also available here
in case they run out of products

When I link to things sometimes the item is unavailable


I found 2-3 coats covers the writing, I did sand it off one but found it made no difference

Use thin coats and let dry completely between coats


I used 3 coats


When completely dry, remove masking tape

I then cut a template of `days to` and attached to the sign using sticky back plastic


Dab white paint onto the stencil, when dry remove stencil


The reason I have put `days to` is the sign can be used all year around, for Christmas, holidays, Birthdays or any occasion you can think of


I then cut a length of string, attaching one end to the board and the other to a stick of chalk